Click ![]() on the toolbar.
on the toolbar.
Note: The Invoices notebook contains a main (header) section and a binder section that contains a number of tabs. The tabs are used to view and manage additional information pertaining to the record displayed in the header. The data entry instructions below pertain to the main (header) section of the Invoices notebook. For an explanation of the data entry requirements for the tabs, refer to Invoices Notebook Tabs Overview.
To create a new invoice:
Click ![]() on the toolbar.
on the toolbar.
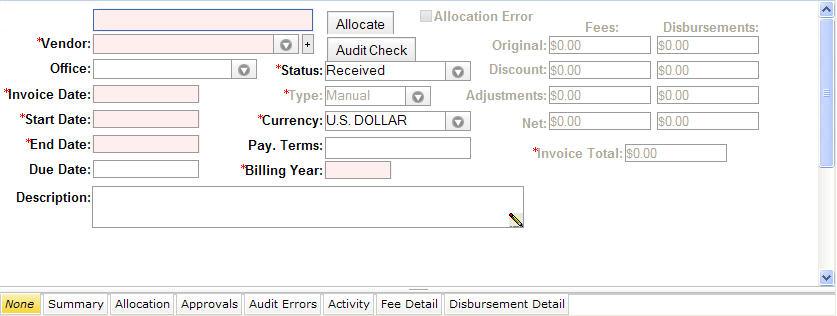
In the Invoice # field, enter the number you want to assign to the invoice.
For the Vendor field, select a vendor name from the dropdown list.
Note: If you want to add a new vendor, click the ![]() button to launch the Vendor notebook.
button to launch the Vendor notebook.
In the Invoice Date field, enter the date the invoice was created.
Note: For this field and all other date fields, press the SPACEBAR to enter today's date.
In the Start Date field, enter the start date for the invoice.
In the End Date field, enter the end date for the invoice.
In the Due Date field, enter the due date for the invoice, if not auto-populated by the system.
Note: In order to add a record, LawManager requires entry of the fields indicated above. All other fields are optional but, depending on the requirements of your organization, can be entered if the information is available. To add and save the record now, go to step 15. To add optional data, continue with step 9.
For the Office field, select the applicable vendor office location from the dropdown list.
For the Status field, select an invoice status from the dropdown list.
In the Currency field, select the currency in which the payment was received.
In the Pay. Terms field, enter the applicable payment terms if known.
In the Billing Year field, enter the budget year (YYYY).
In the Description field, enter a description of the invoice.
Click ![]() to save the record.
to save the record.